


For this blog, I'll be sharing a step-by-step guide to setting up Cucumber-js and PactumJS for API testing.
Cucumber
Firstly, why cucumber? Cucumber has been around for many years now and it is well known for its Gherkin syntax. If you are not familiar with it, it is a Behavior Driven Development tool for writing test cases in plain text. By having plain text for your test scenarios, everyone in the team could easily understand test cases. It also supports many programming languages such as Java, Ruby, C++, and many more! But for this blog, I will be using the JavaScript version which is Cucumber-js.
References:
PactumJS
PactumJS is a REST API automation testing tool that supports all levels in the Test Pyramid. Even though it is fairly new, the tool offers many features compared to other available popular tools. Check out Anudeep's blog for a JavaScript API testing tools comparison.
The Setup
Before proceeding, you will need the following items installed on your machine:
Nodejs
IDE (Visual Studio Code, Sublime Text, Atom, etc.)
I will be using yarn as my package manager but you may use npm if you like. Execute the code below on your terminal to install yarn as a global package.
npm install -g yarn
In case you want a reference for a completed setup, you may refer to the repository I made for reference.
Installation
If you are creating from an empty project, start by executing the code below to create a package.json.
// with npm
npm init -y
// with yarn
yarn init -y
Install both Cucumber-js and Pactumjs to the directory by running npm install or yarn add.
// install with npm
npm install --save-dev @cucumber/cucumber pactum
// install with yarn
yarn add @cucumber/cucumber pactum
Folder Structure
├── cucumber.js
├── assets
│   └── image.jpeg
├── features
│   └──httpbin-methods.feature
│   ├── steps
│   │   └── steps.js
│   └── support
│       └── hooks.js
└── package.json
After installation, continue by creating the folders and files similar to the folder structure above. This may be used as a guide when implementing new projects but feel free to modify it according to your needs.
cucumber.js - exports the cucumber profiles you may set
assets - static files such as images and videos to be used in test execution
features - contains all the feature files (tip: you may group feature files by folder)
steps - step definition files
support - usually contains hooks.js and env file for the environment variables
package.json - project information and module dependencies
Hooks
If you are looking for a place where to put your code for the setup before or after running your scripts, then consider hooks. Cucumber offers hooks like Before, BeforeAll, After, and AfterAll similar to other test frameworks. You might want to consider using them for:
Starting and closing your webdriver
Test data setup and clean-up
Generating reports
Any action before or after it executes the actual feature files
Feature Files
Gherkin uses special keywords to structure the feature file. Each keyword has its own rule for the feature file. The keywords that you would normally encounter are:
Feature - high-level short description of software's feature
Scenario - test case or scenario title
Scenario Outline - used when executing same scenario multiple times
Given - describes the pre-requisite steps before the action
When - describes the actual action for the scenario
Then - indicates the expected result
And - extends the preceding keyword
Examples - contains all the the value for data-driven test execution and normally partnered with Scenario Outline
Feature: HTTP method on httpbin.org

    Scenario: User send request with GET method
        Given user has the correct base url
        When request is sent with GET method
        Then response should be successful
In the example above, the Feature keyword describes the feature itself while Scenario contains the test case title or the scenario being tested. I normally use the Given keyword together with And in setting up the pre-requisites for the request. The keyword When contains the actual action to send a request while Then contains all the assertions needed.
Steps
Let's automate the scenario above by importing the modules on the steps.js file. Import both cucumber and pactum by inserting this code:
const { Given, When, Then } = require("@cucumber/cucumber");
const { spec, expect } = require("pactum");
This will import and destructure the keywords Given, When, and Then from Cucumber. It will also import spec and expect from pactum which we will need on sending and validating the request.
Continue by adding the code below in steps.js file.
Given("user has the correct base url", function () {
  this.baseUrl = "https://httpbin.org";
});

When("request is sent with POST method", async function () {
  const url = this.baseUrl + "/get";
  this.response = await spec().get(url);
});

Then("response should be successful", function () {
  expect(this.response).should.have.status(200);
  expect(this.response).should.have.bodyContains("https://httpbin.org/get");
});
In cucumber-js, this keyword is a special object that gets passed around the steps. You may use the declared properties in this keyword for the succeeding steps in a scenario. This is why we declared this.baseUrl in the Given step and used it in the next step.
IMPORTANT: Do NOT use arrow functions when declaring a step! This will change the properties or context that the this keyword has. Here is a good reference to see the difference between these two functions: The Difference Between Regular Functions and Arrow Functions
Sending Requests
On the second step we've created, this is where we start using pactum. Notice that the function is declared with the keyword async since pactum recommends to use the await keyword when sending a request. In addition, you may only send one request per spec instance. There are different ways in sending a request pactum but it all comes down to which method you prefer for your code. Here are some of the ways to send a request in pactum:
  // using await and chain
  this.response = await spec().get(url);

  // using toss method
  // this will return a promise
  spec()
    .get(url)
    .toss()
    .then((response) => {
      // some response code here
      return response;
    })
    .catch();
  //

  // without chaining method calls
  const sp = spec();
  sp.get(url)
  await sp.toss();
If you want more examples, check out their documentation!
Response Verification
To complete the testing, we used the keyword Then to indicate that the response should be successful. We utilized the expect library from pactum to assert that response from the request. Similar to chai, we may also assert the response in BDD style.
  // bdd style
  expect(this.response).should.have.status(200);
  expect(this.response).should.have.bodyContains("https://httpbin.org/get");
You may still use other assertion libraries in asserting response
  // assert with chai
  const { assert } = require("chai");

  assert.strictEqual(this.response.statusCode, 200);
Refer to PactumJS assertion library for the other assertion formats and methods.
Test Execution
Now that we are done writing our steps and feature file, we can execute the scenarios using cucumber.
// execute all feature files in features folder
yarn cucumber-js features/
// execute a specific feature file
yarn cucumber-js features/httpbin.feature
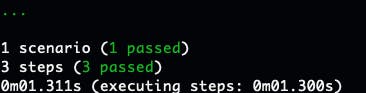
You should a similar result after executing the test.
Reports
Cucumber also offers a built-in reporter so you may view the result in a nicely formatted result. Follow the steps below to set up the reporter.
Open reports.cucumber.io
Create a new collection
Cucumber Reports would generate a token and add this to your terminal as an environment variable.
Restart the terminal and execute the feature file again. It should return a link to the report after executing similar to this

Conclusion
There you have it! I hope this blog helped you in setting up Cucumber-js and PactumJS for your API automation testing. PactumJS has a lot more to offer compared to what I have shown in this guide and I will be creating a separate article for it. If this has been helpful or you enjoyed reading this article, please share this with your friends and give it a like!